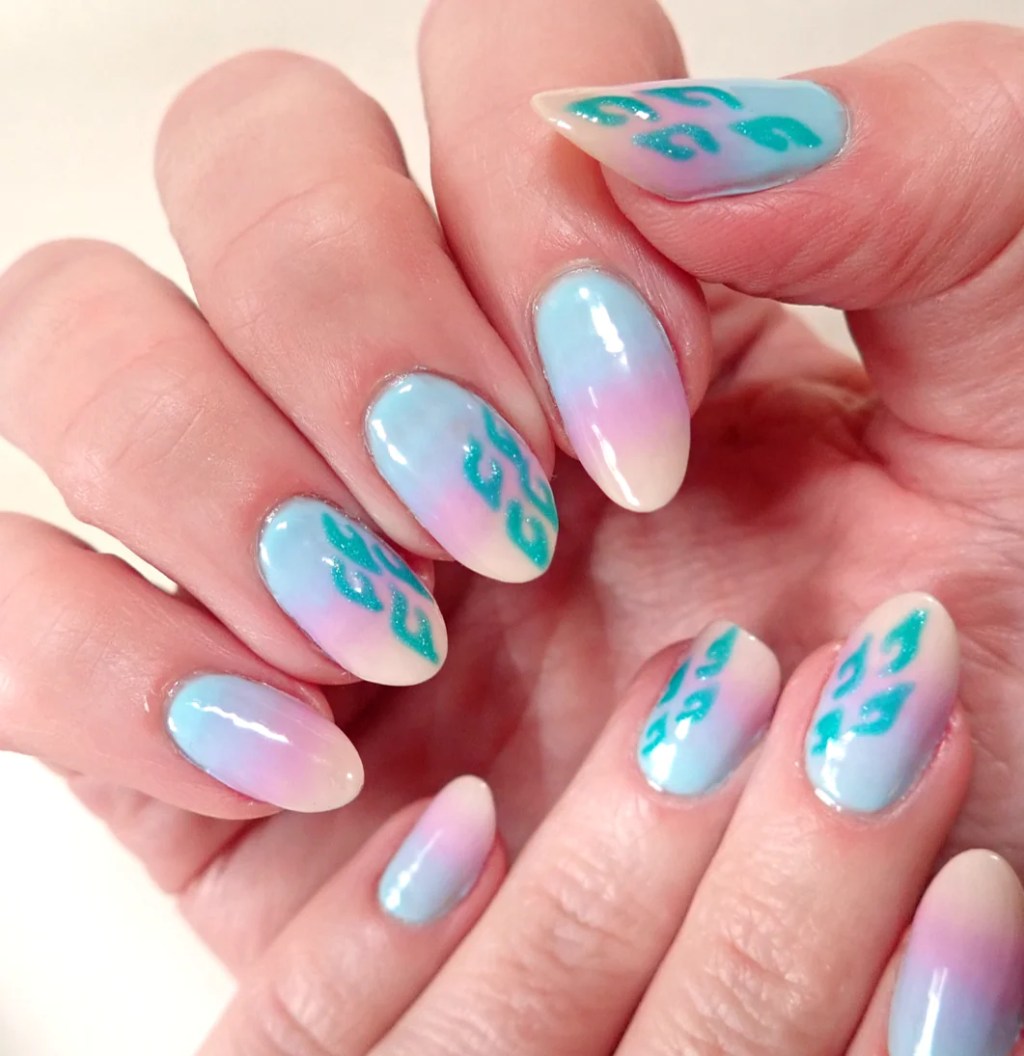
Popular and fun, Ombre nails bring happy & playful vibes to your regular nails. A beautiful blend of colours with the touch of a nail art brush and you’ve got yourself stunning gradient nails! Follow me in this tutorial and learn how to do Ombre nails with gel polish at home.
For this Ombre Nail Art, I was inspired by pastel colours reminiscent of the spring sunset. I used the summery Tiffany blue gel polish for the blue nail colour, the Purple Marshmallow gel polish for the soft purple nail colour and the Beige gel polish for the beige nail colour.
I used my famous Ombre nail art brush to create these Ombre nails – truly THE must-have nail art tool for the job! I tried with a sponge, but for gel polish this nail art brush is the best.
To create the little feathers nail art, I used the glittering Fantasy turquoise gel polish for the turquoise green nail colour, and the 11mm nail art brush to draw them over the nail.
The secret to achieve the best Ombre nails is to blend perfectly the gel colours without leaving any visible demarcations. But first…
To create this look, you’ll need:
- Base gel polish
- Top Coat gel polish
- Tiffany blue gel polish
- Purple Marshmallow gel polish
- Beige gel polish
- Fantasy Turquoise gel polish
- Ombre brush
- 11mm Nail Art brush
- LED or UV nail lamp
- Basic kit (alcohol or cleaner to remove any trace of oil from your nails and clean your brush, paper towel or pad and a wooden cuticle stick to scrape off the gel in case you get over the edges)
Level of difficulty: medium
Let’s get started!
Watch the video and follow the steps
THANKS FOR WATCHING!
Share your nail creations with me on Pinterest @nailartbay


Leave a comment